As of 19th of October, 2022 GitLab SaaS will start applying limits for free usage. We all know that this news is heartbreaking for small to moderate scale enterprises because the new boundaries are pretty much smaller compared to older ones. And that is why you would be interested install self managed GitLab docker on your server.
Let us have a look at the feature that needs to be considered before continuing with the updated FREE PLAN of GitLab.
- Data Storage Limit: 10 GB per project to 5 GB per top-level namespace
- Data Transfer Limit: Unlimited to 10 GB per month
- User Access Limit: Unlimited to 5 Users per top-level namespace
So now, the renewal of the free tier limit will make the GitLab services costlier. But the good news is that these limits do not apply to the GitLab Self-Managed or GitLab Self-Hosted server. If you do not have an idea, I would like to clarify that GitLab is an open-source project. That means you can clone the GitLab project on your server and keep using it without considering recurring payments of GitLab SaaS.
Yes, I agree that GitLab is a self-hosting and will be a bit costlier but the price will be lower than the GitLab SaaS. Additionally, the best part is that the GitLab self-hosting is easy to set up on the server. All these features are available due to the GitLab Docker Image they are providing.
Here, I have mentioned some steps that can be helpful for you to set up your own GitLab Self-Hosted service. The steps are as follows:
1. Docker Installation with Docker Compose
2. Create GitLab Container
3. Configure GitLab Self-Managed Instance
4. Auto Update on GitLab
5. Auto Backup in GitLab
6. Restore
1. Docker Installation
Suppose you have selected GitLab setup on your local server. In that case, you can refer to the official setup documentation of Install Docker Engine and Install Docker Compose and then continue with the 3rd step of “Create GitLab Container”.
Those ready with set up on the local server can follow the same process as below to set up the Docker with Compose:
- Update Packages the command:
sudo yum update
- Install Docker Engine with the command:
sudo yum install docker
- To install Docker Compose, use the below commands:
sudo yum install python3-pippip3 install --user docker-compose
- You can verify both of these installations by checking their versions:
docker -vdocker-compose -v
- The default user would not be able to access the ‘docker’ command. You can execute these commands to make the $USER capable of accessing ‘docker’ commands:
sudo usermod -a -G docker $USERid $USERnewgrp docker
- You just need to keep docker up and running even after rebooting your system. Follow the below commands for the same:
sudo systemctl enable docker.servicesudo systemctl start docker.service
- The below command will give your confirmation of the docker service’s running state:
sudo systemctl status docker.service
This is all to set up the Docker with Docker Compose in your server, and we are ready to start the next step of Creating a GitLab Container.
2. Create a GitLab Docker Container
Let’s create a GitLab Container to perform this step we will need the docker-compose.yml file. This file will contain GitLab’s Docker Image and initial configuration to start Self-Managed GitLab.
You can create a blank docker-compose.yml file at your comfortable location on the server. Let’s create it at /home/$USER/my-gitlab/docker-compose.yml and refer to the below content to set it inside the file.
version: '3.7'
services:
  gitlab:
    image: 'gitlab/gitlab-ce:latest'
    container_name: 'my-gitlab'
    restart: always
    hostname: 'localhost'
    environment:
      GITLAB_OMNIBUS_CONFIG: |
        external_url '<https://gitlab.DOMAIN>'
        pages_external_url '<http://pages.DOMAIN>'

        # SMTP Mail Configuration
        gitlab_rails['smtp_pool'] = true
        gitlab_rails['smtp_enable'] = true
        gitlab_rails['smtp_address'] = "smtp.gmail.com"
        gitlab_rails['smtp_port'] = 587
        gitlab_rails['smtp_user_name'] = "<EMAIL>"
        gitlab_rails['smtp_password'] = "<PASSWORD>"
        gitlab_rails['smtp_domain'] = "smtp.gmail.com"
        gitlab_rails['smtp_authentication'] = "login"
        gitlab_rails['smtp_enable_starttls_auto'] = true
        gitlab_rails['smtp_tls'] = false
        gitlab_rails['smtp_openssl_verify_mode'] = 'peer'

        # Gmail Incoming Mail Configuration
        gitlab_rails['incoming_email_enabled'] = true
        gitlab_rails['incoming_email_address'] = "income+%{key}@gmail.com"
        gitlab_rails['incoming_email_email'] = "<EMAIL>"
        gitlab_rails['incoming_email_password'] = "<PASSWORD>"
        gitlab_rails['incoming_email_host'] = "imap.gmail.com"
        gitlab_rails['incoming_email_port'] = 993
        gitlab_rails['incoming_email_ssl'] = true
        gitlab_rails['incoming_email_start_tls'] = false
        gitlab_rails['incoming_email_mailbox_name'] = "inbox"
        gitlab_rails['incoming_email_idle_timeout'] = 60
        gitlab_rails['incoming_email_expunge_deleted'] = true

        gitlab_pages['enable'] = true
        letsencrypt['contact_emails'] = ['<CONTACT-EMAIL>']
        alertmanager['admin_email'] = '<ADMIN-EMAIL>'
        gitlab_rails['gitlab_shell_ssh_port'] = <PORT>
        # Add any other gitlab.rb configuration here, each on its own line

    ports:
      - '80:80'
      - '443:443'
      - '<PORT>:22'

    volumes:
      - './gitlab-data/config:/etc/gitlab'
      - './gitlab-data/logs:/var/log/gitlab'
      - './gitlab-data/data:/var/opt/gitlab'
In this file, you need to update all the details mentioned with <> (angle brackets).
If you want to use Gmail with SMTP, you can refer to this link to create SMTP credentials: Sign in with App Passwords. If you want to use the POSTFIX service provided by default in GitLab Image, you should remove # SMTP Mail Configuration & # Gmail Incoming Mail Configuration and share the port by adding a line -'25:25' in the ‘ports’ section.
As your .yml file is ready run the command docker-compose up -d in the directory where you placed the .yml file. This command will create the container within approx 5 minutes, and you will find a new directory, ‘gitlab-data’, beside the .yml file. This file will contain useful data like configuration, logs and actual data generated by repositories.
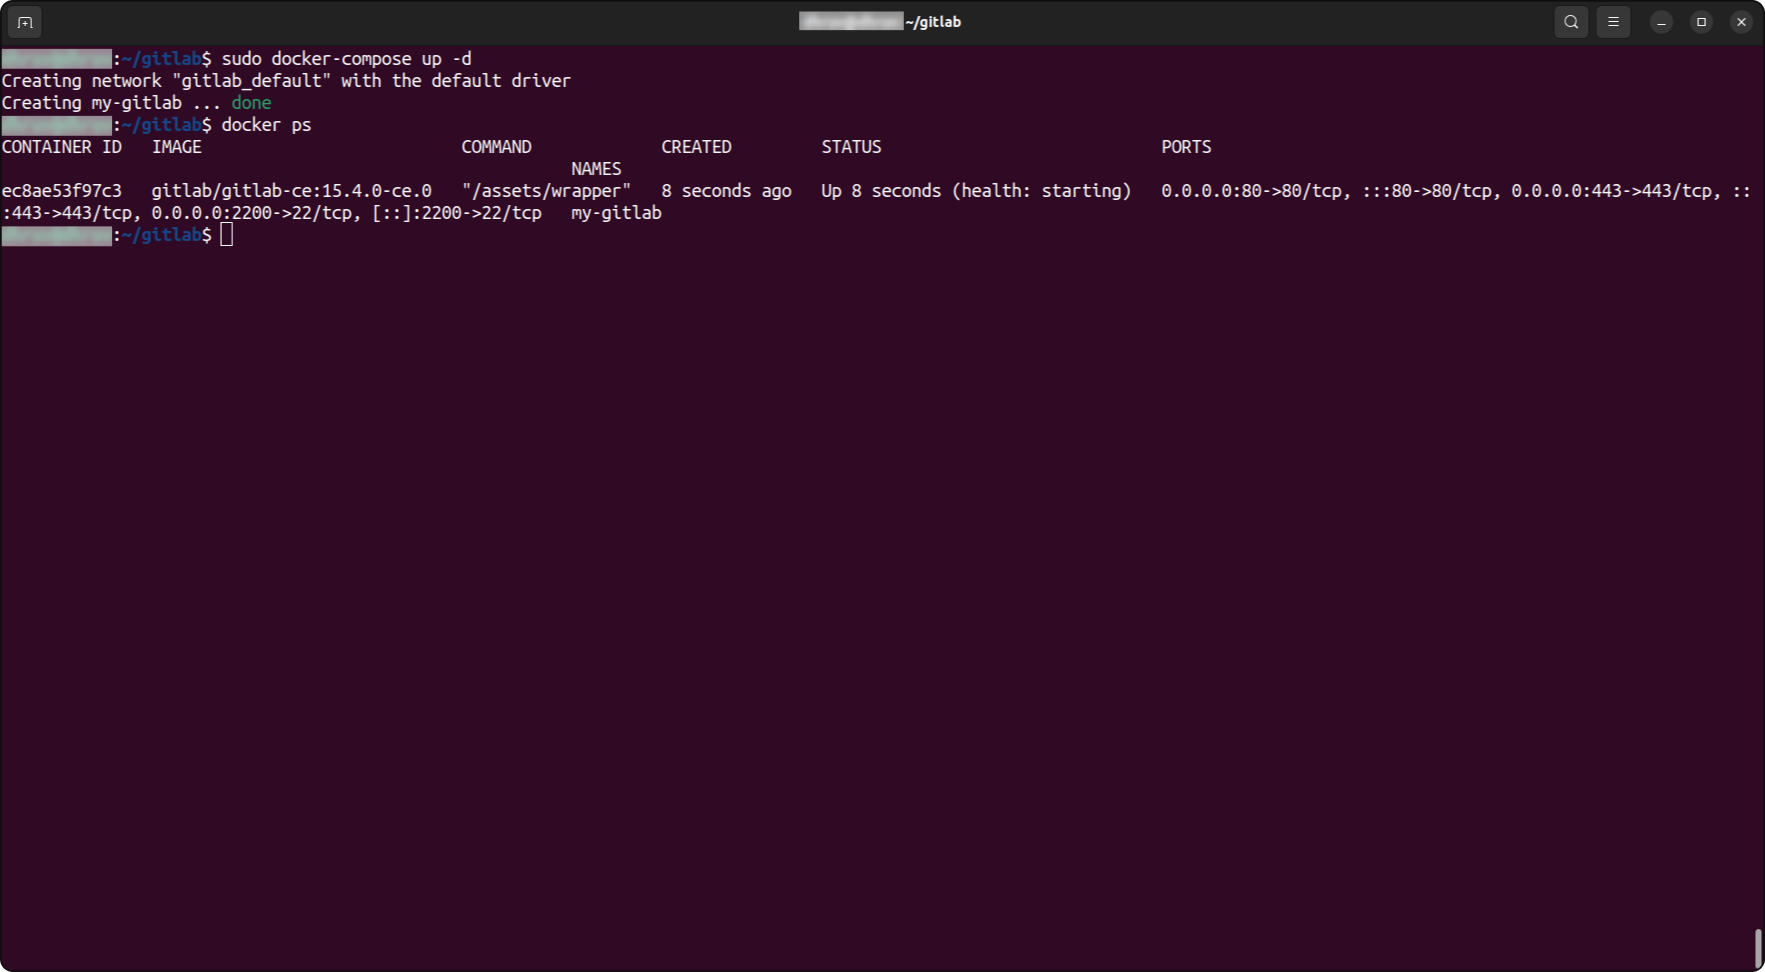
As soon as the container starts working, you can open the GitLab page on the URL specified with the external_url configuration.
Once you are at the login page, you will be able to log in to the username ‘root’ and the password will be available in the file inside the newly created gitlab-data/config/initial_root_password file.
With this step, you are done with setting up GitLab Docker and ready to use it. But before that, I would recommend you get aware of “how to configure” this setup.
3. Configure GitLab Self Managed Project
After setting up the GitLab docker instance, you will have admin access to manage your GitLab settings, services and securities. To access the configuration section, find the “Admin” option inside the top-left menu list. By clicking that button, you will be redirected to a detailed Admin Area to manage GitLab configuration.

In the Admin Area, you will find more than expected configuration settings. This will help you to keep your repository management tool as per your needs. Here, have a look at some of the listed pages with their usage so that you can quickly go through the Admin Area.
- Overview: It provides detailed information regarding projects, groups and users. Also, you will find out key statistics and service details like job, runners and the Gitaly Servers.
- Monitoring: Here, you will find System Information of your server, Background Jobs & Migration status and a Health Check to verify if every part of the Self-managed GitLab server is working smoothly or not.
- Settings: I would say this is the main configuration area where you can find and apply all dynamic settings. Some required configurations include:
- Setting a limited number of projects created by users.
- Integrating third-party tools along with a captcha.
- Reporting sections to align your users with strict rules.
- Networking-based restrictions over API and data transfer limit.
- General appearance to set this GitLab project personalized.
- Preferences will be useful to set up required changes.
I don’t think that you have to make any changes, though you can have a look and install GitLab docker to make your setup comfortable for your organization.
Also, we can set up additional security parameters. e.g., Any repositories managed by this GitLab server should only be accessible over SSH access and not with HTTPS. And you can apply IP based restrictions to get it accessible over your organization’s network or VPN. This is possible because of self-hosting. This means we can apply the networking rules regulation directly to our server instead of the GitLab settings.

Managing a self-hosted GitLab instance requires periodic updates, backups and the ability to restore data efficiently. This guide will walk you through automating these tasks using Docker, which will ensure that your GitLab setup remains updated, backed up and recoverable in case of failures.
4. Auto Update on GitLab
After completing all the steps for configuration, In case you want to update your GitLab you can follow the steps given below:
- Navigate to the GitLab directory
cd /path/to/home/example-git
- Pull the latest GitLab image
docker compose pull- This command fetches the latest version of GitLab from the Docker registry.
- Recreate and restart the container with the latest image
docker compose up -d- This command ensures the GitLab container is updated without downtime.
- Verify the update
docker ps- Ensure the container is running with the new version.
5. Auto Backup in GitLab
Regular backups are important to prevent data loss in case of accidental deletions, corruption or other failures. Automating GitLab backups ensures that you always have recent data available for restoration.
#!/bin/bash

# Path & Variables
home_dir="/path/to/home"
git_dir="${home_dir}/example.git.com"
data_backup_zip_path="${git_dir}/gitlab-data/data/backups/example-git-data_gitlab_backup.tar"

backup_root="/path/to/backup"
backup_dir="${backup_root}/example-git/"

container_name="example-git"
timestamp=$(date -d "today" +"%Y%m%d%H%M")

# Create data backup zip file
 echo "Data backup task starting for GIT-EXAMPLE"

# Create data backup zip file
docker exec -t $container_name gitlab-backup create STRATEGY=copy SKIP=remote BACKUP=example-git-data

# Move and set permissions for the backup file
mv $data_backup_zip_path ${backup_dir}/${timestamp}-data_gitlab_backup.tar
chmod a+r ${backup_dir}/${timestamp}-data_gitlab_backup.tar
chown root:root ${backup_dir}/${timestamp}-data_gitlab_backup.tar
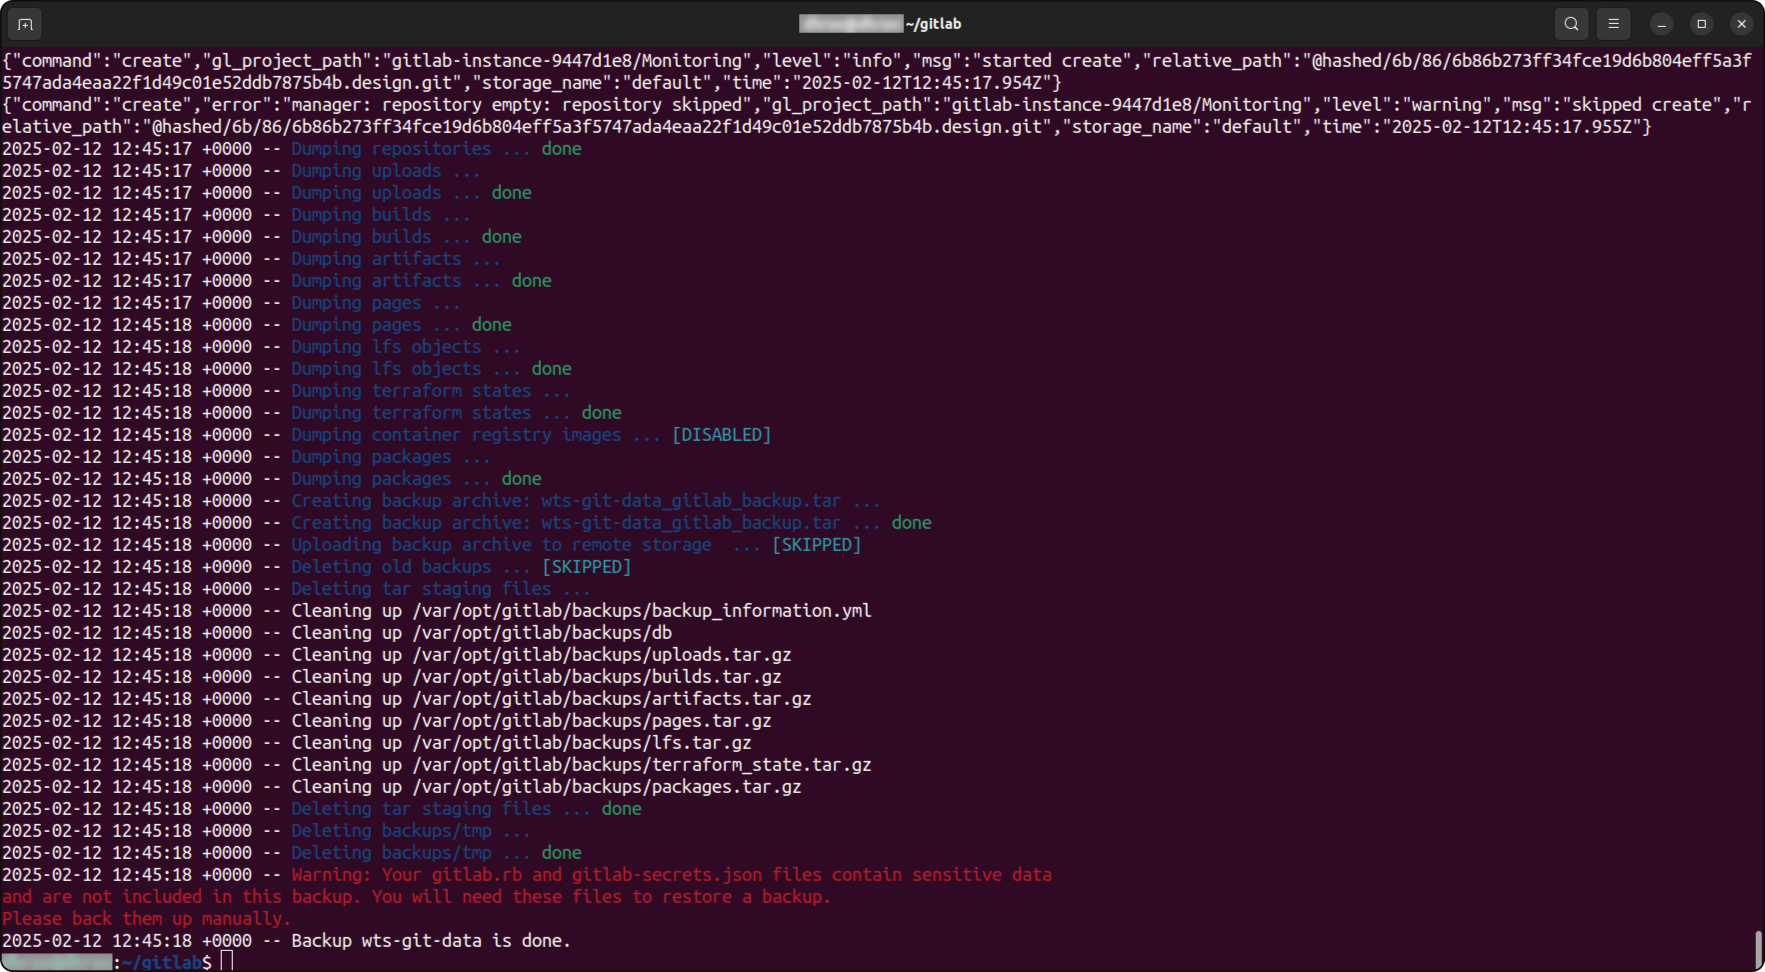
➢ Important:
- Adjust variables: Modify home_dir, git_dir, backup_root and other variables to match your environment.
- Backup Directory: Make sure that your backup disk path is mounted properly and accessible for the user running this script.
6. Restore
When needed, you can restore a GitLab backup using the following steps:
# Stop the processes that are connected to the database
docker exec -it $container gitlab-ctl stop puma
docker exec -it $container gitlab-ctl stop sidekiq

# Verify that the processes are all down before continuing
docker exec -it $container gitlab-ctl status

# Run the restore command
docker exec -it $container gitlab-backup restore BACKUP=example-git

# Restart the GitLab container
docker restart $container

# Check GitLab
docker exec -it $container gitlab-rake gitlab:check SANITIZE=true
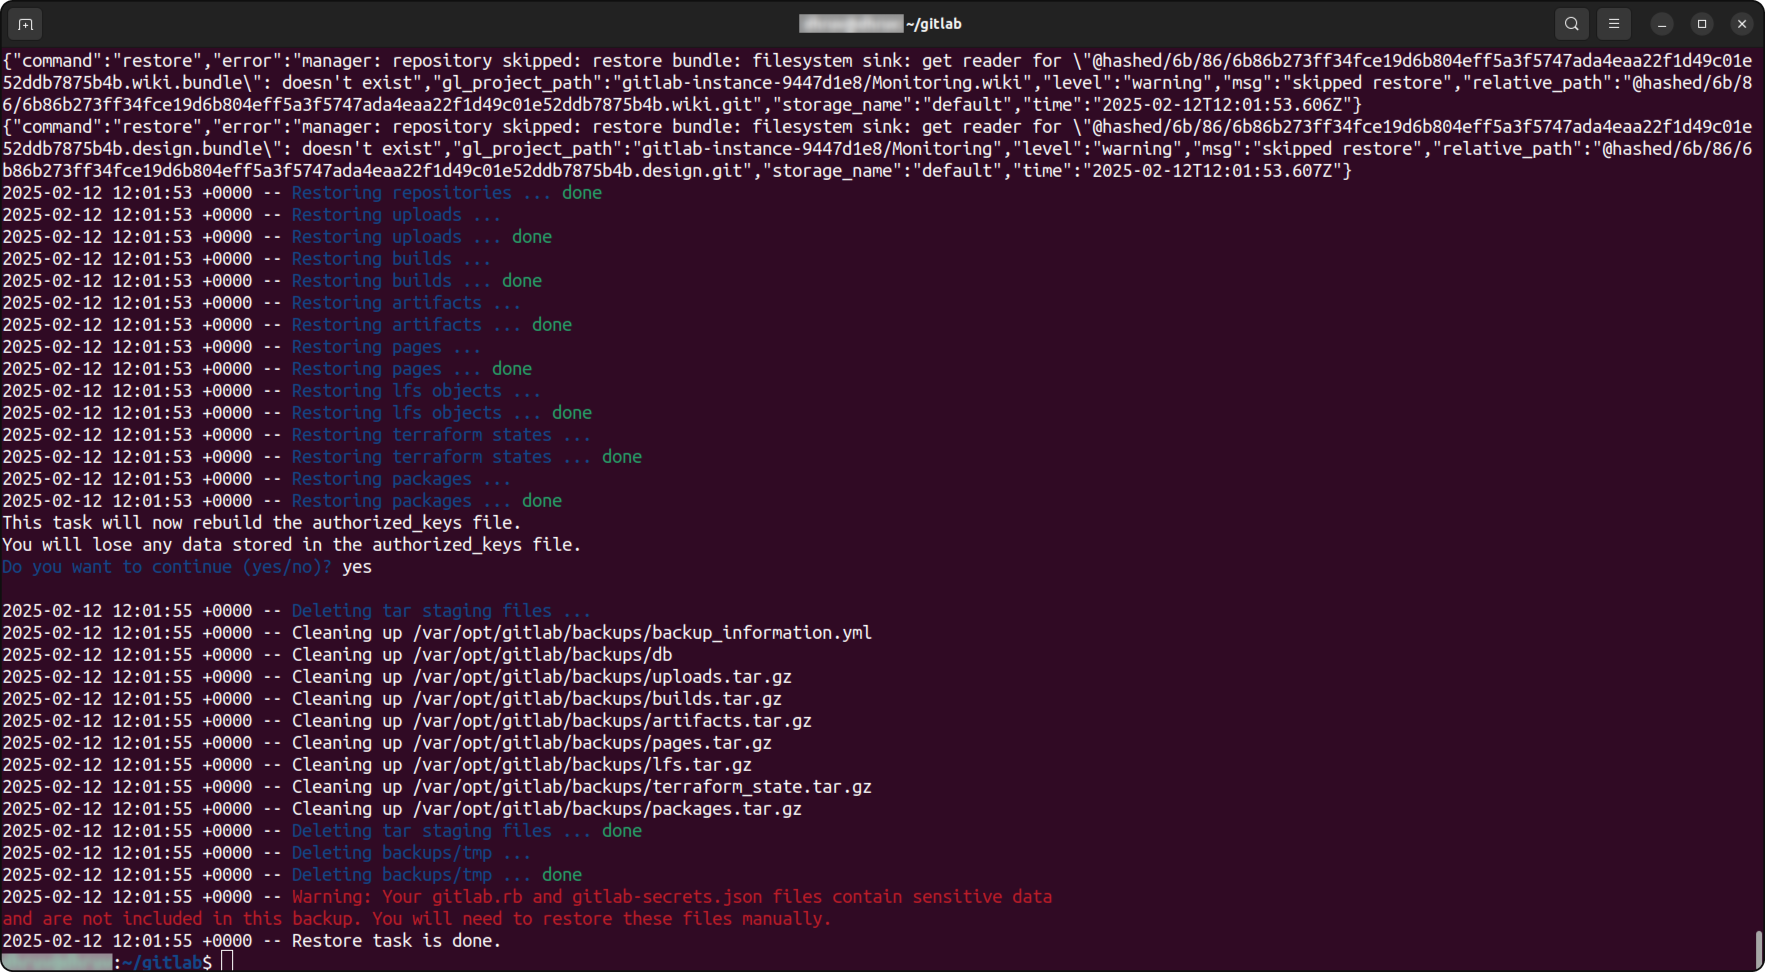
By implementing these auto-update, auto-backup and restore processes you ensure that your Self Managed GitLab instance remains secured, updated and recoverable in case of failure.
With this, you have completed the process of your Self Managed GitLab, and your team will be ready to link with it. In case you face any problems with these steps, fill free to contact us by sending an email to info@weetechsolution.com or by clicking here.
Now, you have your own GitLab on your server. This Self-Managed GitLab comes without any user limit per group or project. The repository size will be up to 10 GB per project and the Data Transfer limit will be as large as your server’s capacity.
In the end, I’d like to thank the GitLab team for providing a very useful utility product for the IT sector.
Also Read: DevOps Best Practices

